 have")
 |


| Quantity: | |
|---|---|
HP800E
Catcast
8517623990
HP800E 8 in 1 H.265 hashcode encoder

Summary
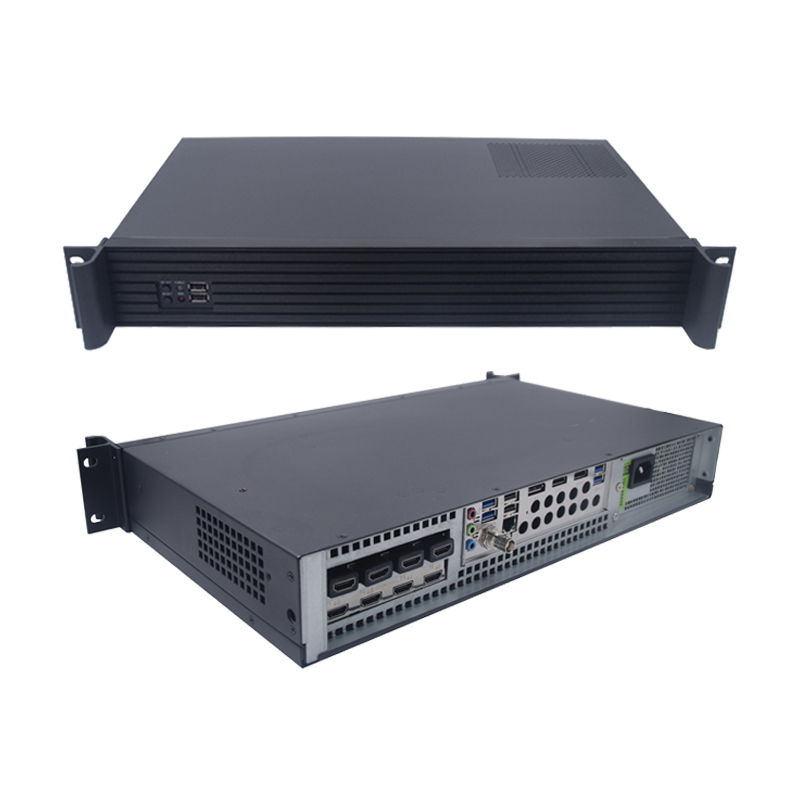
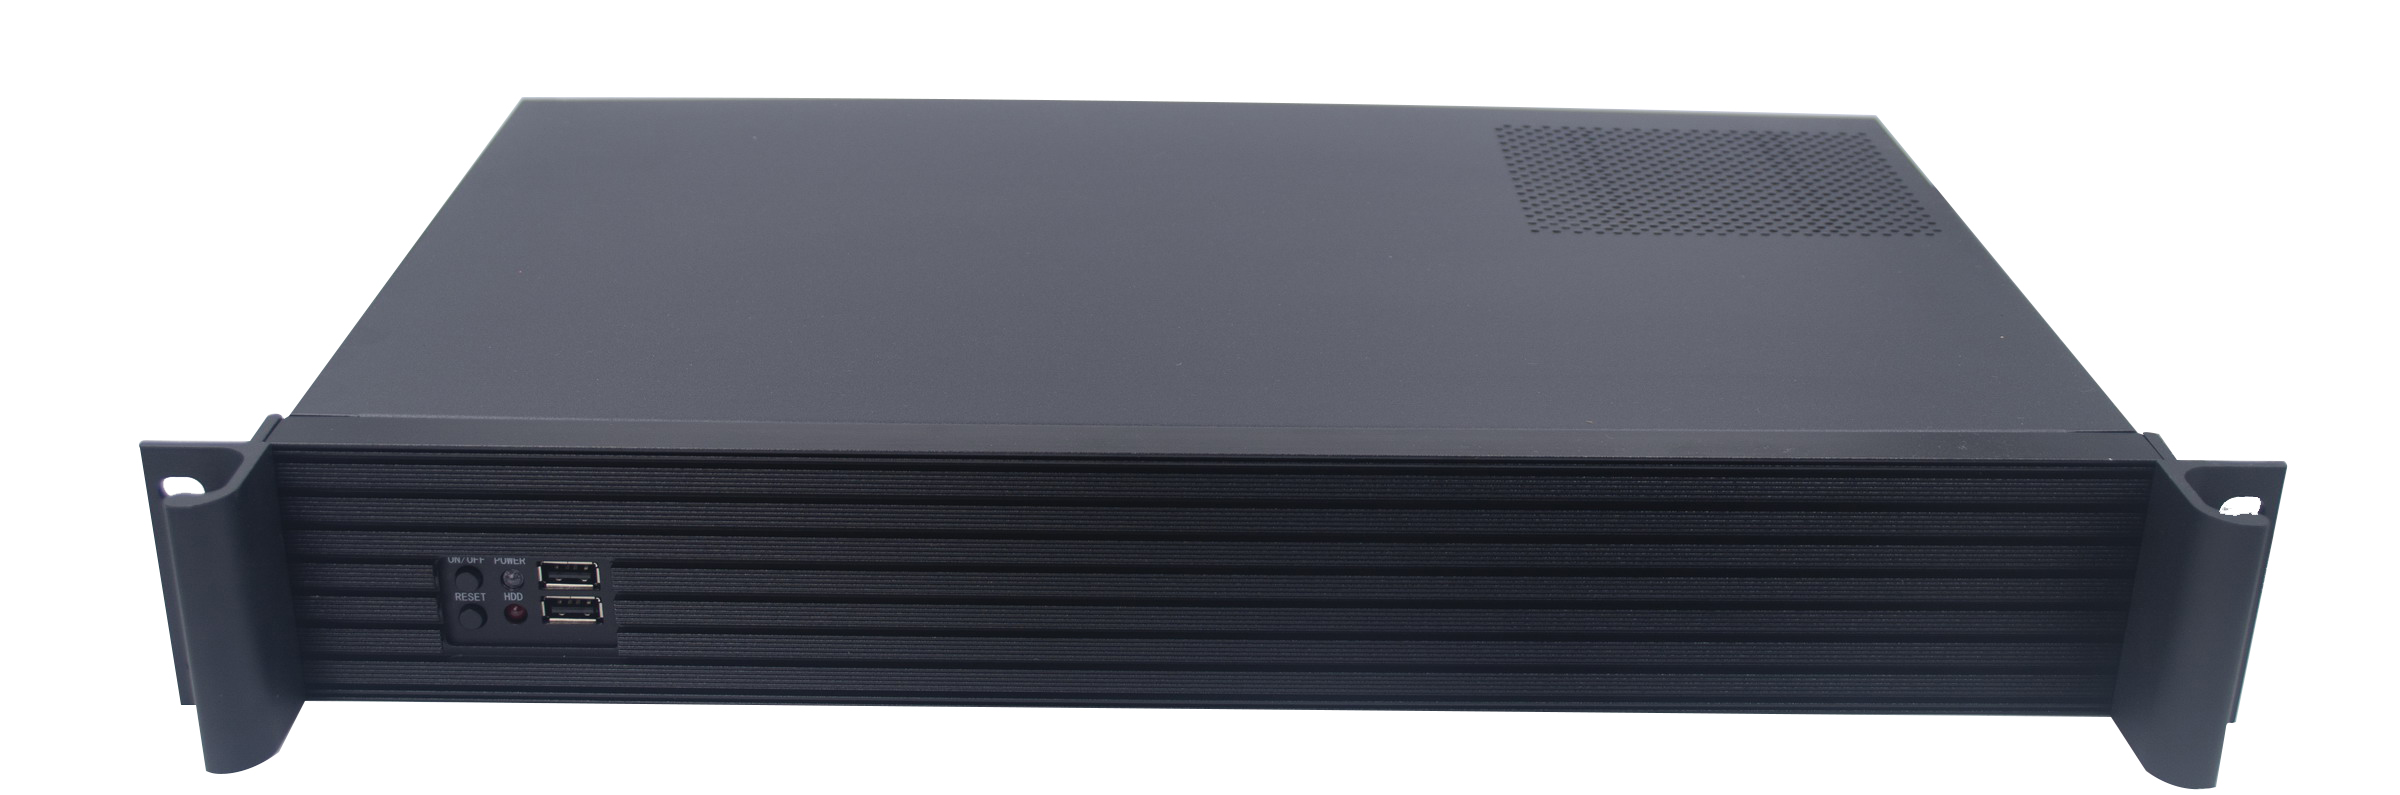
HP800E HEVC encoder is mounted in an 1U chassis which realized 8 channel HD capture, real-time HD encoding, RTMP/UDP/RTP publishing. Comparing with the present encoder, new encoder's H.265 encoding efficiency is 75% up. With highly integrated hardware and software, the equipment is convenience for customers to push RTMP streams into stream server. it also support ASI output.The product will greatly save the network traffic, electricity and space utilization rate, improve the live operator front-end equipment reliability, reduce operating costs and entry barriers.
Main Specs
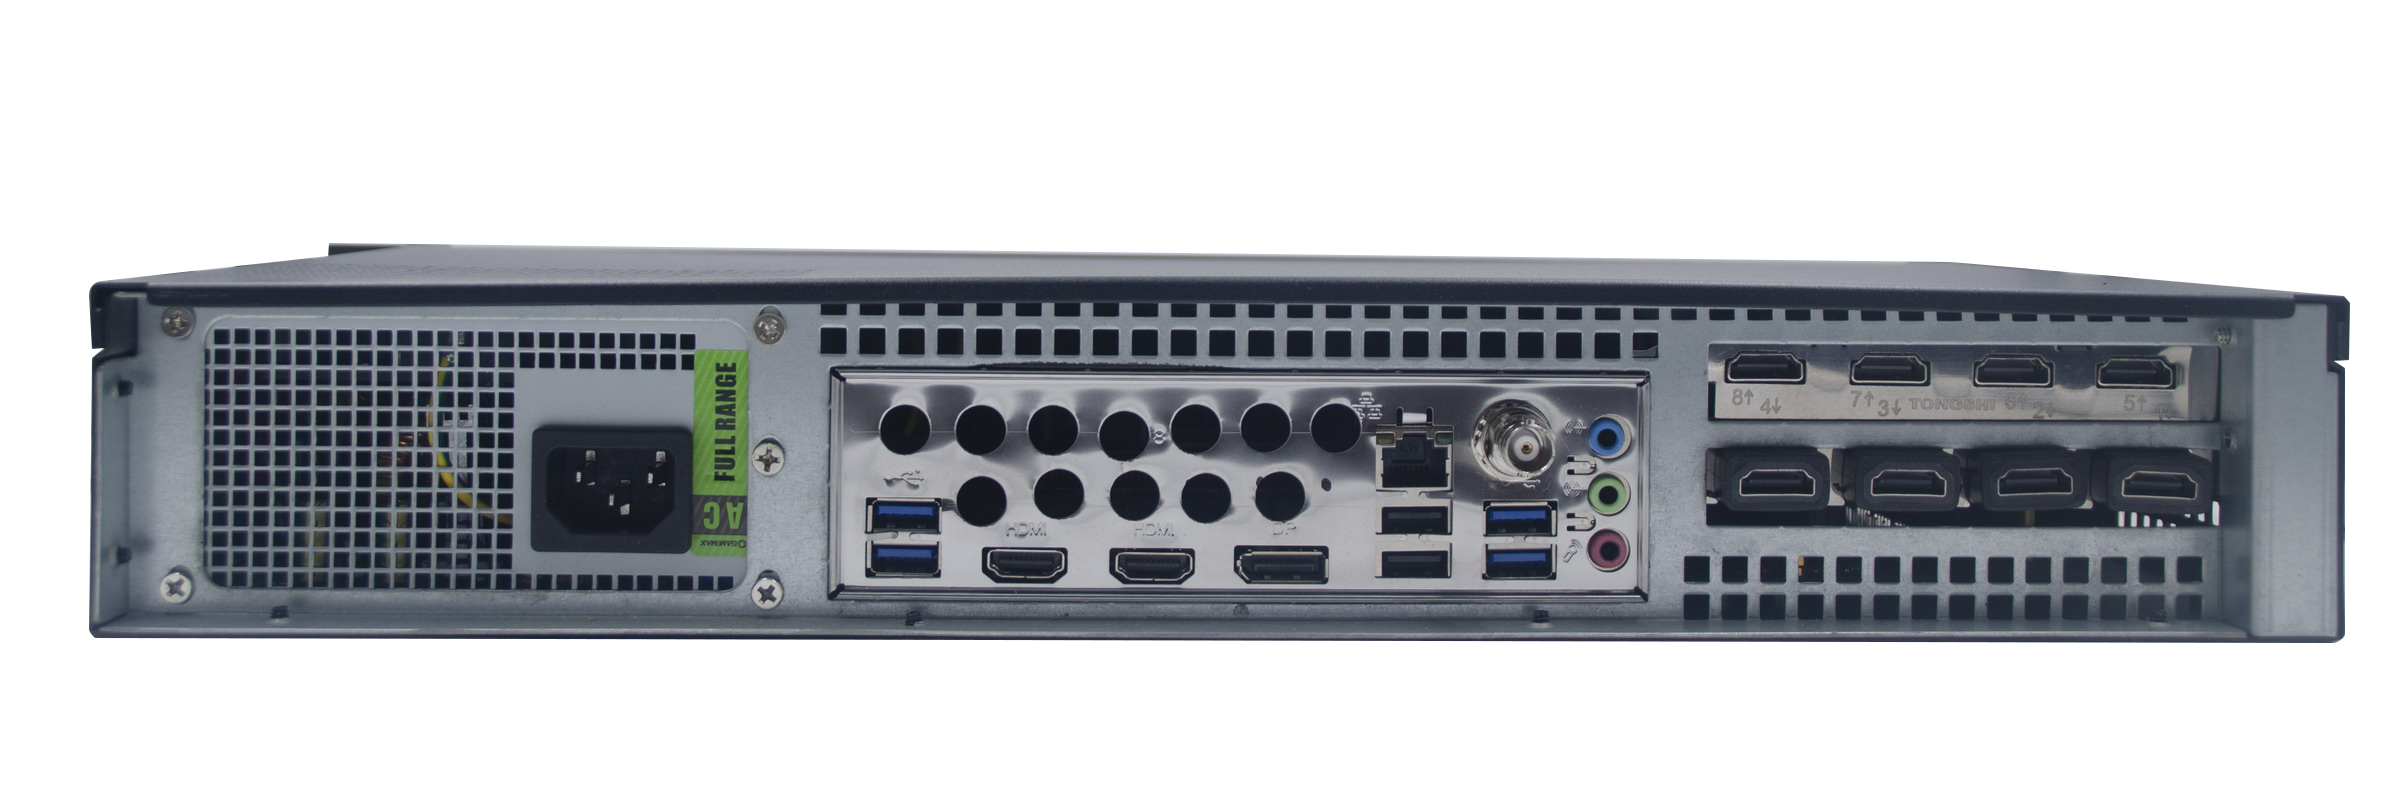
1. Input Interface: 8 HD channels
2. 8 HD Input: 720P@50/60 1080i@50/60,
Encoding Output - GPU designed for H265 encoding:
with compared function: max 4 channels H265/264 1080p@50/60fps
Normal Encoding:
H.265 encoding - 4 channels 1080p@50/60fps & 4 channels 1080p@30fps
H.264 encoding - 8 channels 1080p@25/30fps
3.Output Interface: 1*ASI output
4. Output Interface: 1*RJ45 100/1000Mbps, Output Protocol: RTMP/UDP/RTP
5. OS: Ubuntu: 20.01.4 LTS, RAM DDR4 3200 8G * 2
6. Power: AC110/220 50/60Hz

The main interface of software


When the equipment is powered on, it will automatically run the software "Preview & Live Broadcast Stream", its main interface as shown above. If the software is closed, don’t need to restart the equipment, right-click the desktop and choose "Open in Terminal" item, then type in the terminal as "./run.sh" & "Enter key". Work settings are as follows:
1) Software automatically run: activate "Auto start" function (hook means activation) on the upper right corner of the main interface.
2) Check the working state: each upper right corner messages will display the current RTMP working state. Green for normal, Red for abnormal, Gray for closing.
3) Check the RTMP address: click the "URL" button. You can quickly view all the RTMP address.
4) Full screen viewing: double-click any of the small screens, you can watch the full screen, double-click again will return to the small screen.
5) Close the preview screen: click the button in the lower right corner (button to the right of "stop"), you can close the preview screen, this will save CPU resources.

1) Click on the Channel drop-down list, chooses a channel number (1~8).
2) Click on the Quality drop-down list, choose an encoding quality: Super (2300Kbps), Ultra (2000Kbps), Excellent (1200Kbps), Good (1000Kbps), Fair (800Kbps), Poor (600Kbps), Mobile (400Kbps)
3) Activate the RTMP settings bar (hook means activation), type the address and audio delay (0~8000 ms) of the streaming media server.
4) Activate the UDP/RTP settings bar (hook means activation), type the address, port number (1024~65535) and audio delay (0~8000 ms) of the streaming media server.
5) As a comparison (or reference) input, you need to set the channel number of its corresponding.
6) Set new Logo and its location: activate "Add Logo Enable" function (hook means activation), the converted logo file into the specified directory, type x and y coordinate.
7) After all settings are completed, click the "Save" button to save and exit.


 have")